
Ever wondered what to do with a project AFTER you bind off? Which steps to take that give a professional finish to your hard work? This tutorial is going to walk you through my preferred finishing touches that take your wool project from done to stun!
The three basic steps we'll go through are:
Soaking and blocking are a magical process. When you get wool wet and then dry it, the wool will retain the shape it had when it was wet. Water also relaxes the wool, allowing it to stretch more than it would when it's dry. For example the Pendean Shawl shown in this tutorial measured 24 1/2 by 52 inches before blocking and 30 by 63 inches after blocking. For all types of knitting, blocking evens out the stitches and gives your finished work a more polished look.
Blocking works better with some stitch types than others; it's less necessary for cables, garter, stockinette, and double knitting. With lace knitting the blocking process really is necessary to see the true beauty of the stitches.
Blocking does need a moderate investment in materials and time, but I think you'll find it's worth it! Once you have the materials they can be used again and again.
You can buy most of these items on the Knit Picks website; click each one to take a look. Click here to see their full selection of blocking tools.
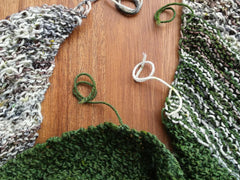
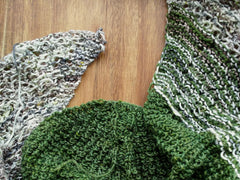
Using your tapestry needle, draw the ends of your yarn under the loops of stitches on the wrong side of the work.
With your piece ready for blocking, it's time to set up your blocking space.
Lay the blocking boards out on a flat surface. Make sure this is a surface that can be left undisturbed while the piece dries! Lay the piece out on the blocking boards. Your boards should be 25-40% larger than the project at this stage.
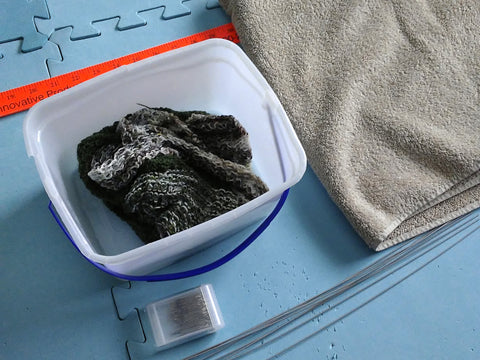
This is also when I play the fun game of "Fold the project just right to fit into the soaking container". Bonus points if it can unfold in half to fit on a towel afterwards.
Fill a sink, ice cream tub, bathtub, hot tub, Olympic swimming pool, or other container large enough for your project with tepid (lukewarm) water. Do NOT use hot water - water that's too hot can felt the yarn or cause the dye to run. Add a splash of Eucalan or other wool wash to your water. My favourite is Eucalan Wrapture - the jasmine scent is delightful, and lingers for weeks afterwards.
Set the project on top of the water and allow it to sink naturally. This can take 10-30 minutes to fully submerge. Don't try to force it - it'll just pop back up or leave trapped air bubbles. You want the water to soak deep into every stitch.

Once the piece is fully submerged and soaked, drain the water and very gently press excess water out of the project. You want to get out just enough that it's not actively dripping.
Spread your piece out on a large bath towel. It's okay at this stage if there are still several layers of project folded up, but try not to have more than a few layers.
Roll the towel and project up together.

Unroll the project from the towel and unfold it so that it lies flat on the blocking boards. Remove any cats, children, or house elves that may have settled on the boards first - you can block with them in place, but results may be...unpredictable.
With your project flat on the boards and your household sulking, weave the blocking wires into the edge stitches on all sides. These wires will help maintain the shape of your piece while it blocks.
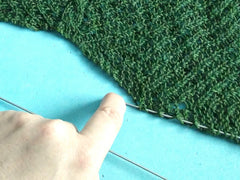
Pin one side in a straight line along one edge of the blocking boards. If you're not using blocking wires, you may need additional pins at this stage. It's recommended not to use the entire world supply of pins if you can avoid it.
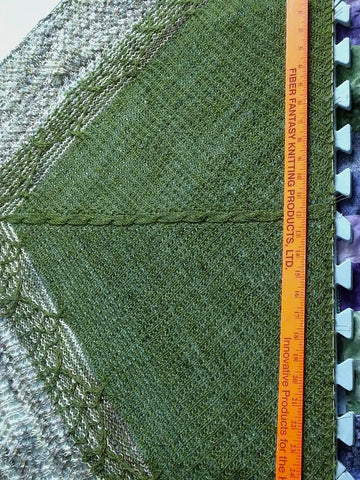
*Gently* stretch and pin the others sides into a straight line. Use the yard stick to help with the straight lines and measure as necessary to make sure the measurements are consistent where needed. For this triangle shawl I made sure that the cable spine was in the centre of the boards, both sides were the same width, and that the three different stitch sections were the same width along the straight edge and the centre of the spine.

Now for the most exciting part: Wait for it to dry. If it's nice outside or you live on Tattooine, opening a window for a breeze can help. In cold weather, or when living on Hoth, use an electric fan to help it dry faster.
When it feels COMPLETELY dry, remove the pins and pull out the wires. The wool, having dried in this shape, will now maintain that shape.
Voila - a truly stunning handcrafted masterpiece!
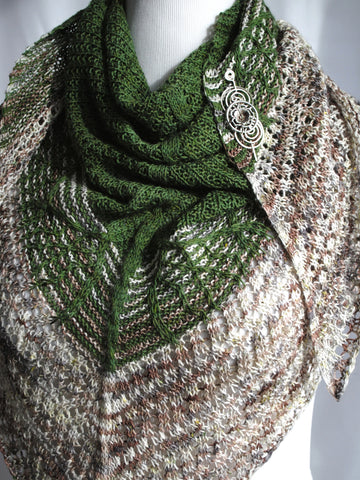

The shawl used through this tutorial is a triangular shawl made with yarn from Destination Yarn. The pattern is Pendean, and will be released February 15th 2018. The English Rose Shawl Pin used in the pictures is available here.
(Sign up for my newsletter or follow me on social media to make sure you don’t miss it!)
Thanks for reading!
Comment below with your prefered finishing techniques.
Comments will be approved before showing up.


Kathryn Andrews
February 11, 2018
These are very useful tips. I do not yet have blocking wires, and I have in fact used the entire household supply of pins for a blocking project before. The rest of the world was thankfully safe from my pin stealing rampage.
Since I live on Dagobah, I have to run the A/C most of the time to combat the humidity and allow my projects to actually dry. Perhaps some of your readers may also live on Dagobah, or in a rainforest like the Forest Moon of Endor, and may be able to commiserate.