
This week's Tip Tuesday features how to cable without a cable needle. Always losing your cable needle? Tired of picking up and setting down your cable needle? This technique will free you of those hassles. After a bit of practice it is also much faster; perfect for projects with lots of cables. Scroll to the end for a video tutorial of this technique on my YouTube Channel.
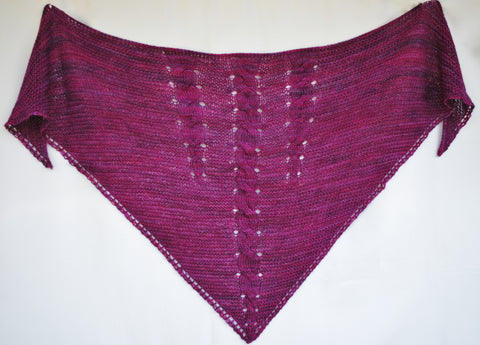
Featured above is Intrepid Ardor in yarn from Stunning String Studios
For patterns using cables on my website Click Here
For ALL of my cable patterns on Ravelry Click Here
The basic concept of cabling without a cable needle is to re-order the stitches before working them. This technique works well on cables that are worked over a total of 2-6 stitches. It works well with most yarns. If your yarn is a shiny slippery silk then a cable needle is advised.
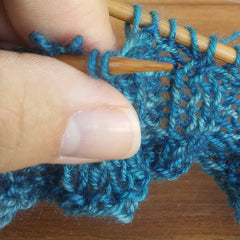
Set Up Step for both Front and Back Cross Cables
Slip the stitches to be cabled from the left needle to the right needle.
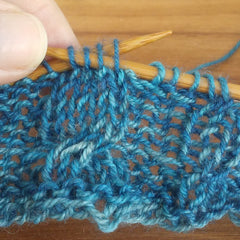
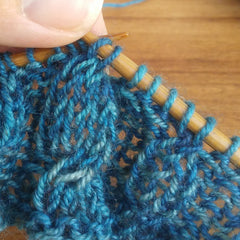
Step 1
Insert the left needle from the front into the stitches on the right needle that would have been placed on a cable needle.
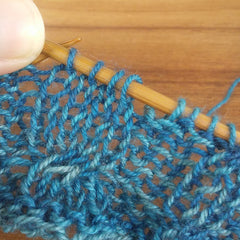
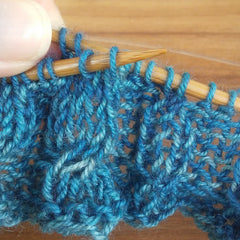
Step 2
Slip all all stitches that are part of the cable off of the right needle. 2 stitches will be loose. The right needle need only be slipped out long enough to set these stitches free. Immediately reinsert the right needle into the freed stitches.
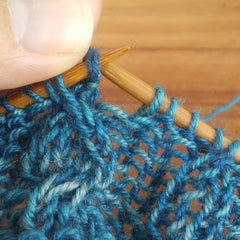
Step 3
Slip the Stitches From the right needle onto the left needle. The stitches are now in the correct order. Knit or purl the cable stitches as written in the pattern.

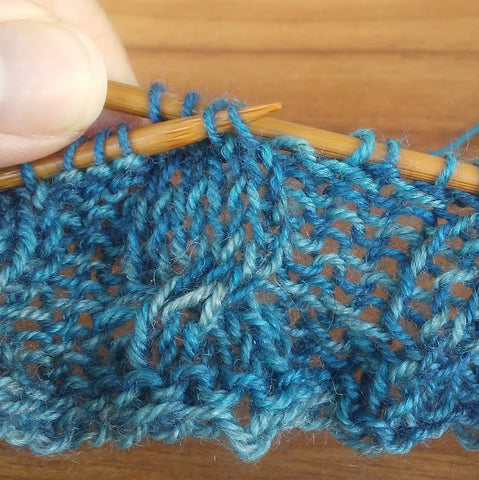
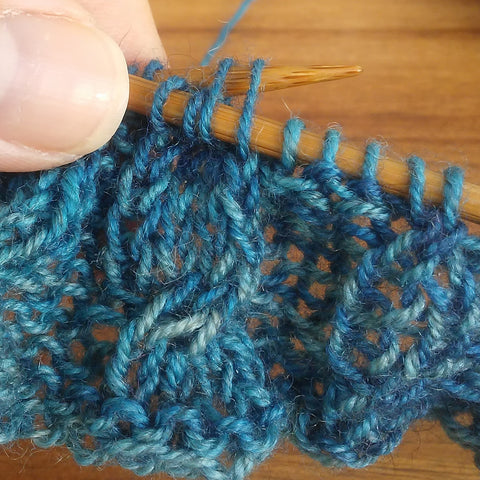
Step 1
Insert the left needle from the back into the stitches on the right needle that would have been placed on a cable needle.
Step 2
Slip all all stitches that are part of the cable off of the right needle. 2 stitches will be loose. The right needle need only be slipped out long enough to set these stitches free. Immediately reinsert the right needle into the freed stitches.

Step 3
Slip the Stitches From the right needle onto the left needle. The stitches are now in the correct order. Knit or purl the cable stitches as written in the pattern.


Here's a Video Tutorial!
Please Like the video and Subscribe to my YouTube channel to be notified when hew videos are released! (And every like and subscribe brightens my day! :)
Comments will be approved before showing up.


